According to recent statistics from LinkedIn, a leading professional networking platform, having a strong presence on the site can significantly benefit organizations.
With over 740 million members worldwide and more than 55 million registered companies, LinkedIn offers a vast network for businesses to establish their brand, engage with potential clients, and connect with industry professionals. Adding your organization on LinkedIn is a crucial step towards expanding your online presence and leveraging the platform’s numerous opportunities for growth.
In this guide, we will provide you with a step-by-step process to help you seamlessly add your organization to LinkedIn and maximize its potential. (Source: LinkedIn Official Statistics, 2023)
step-by-step process of how To Add Organizations On Linkedin
Step 1: Sign in to your LinkedIn account
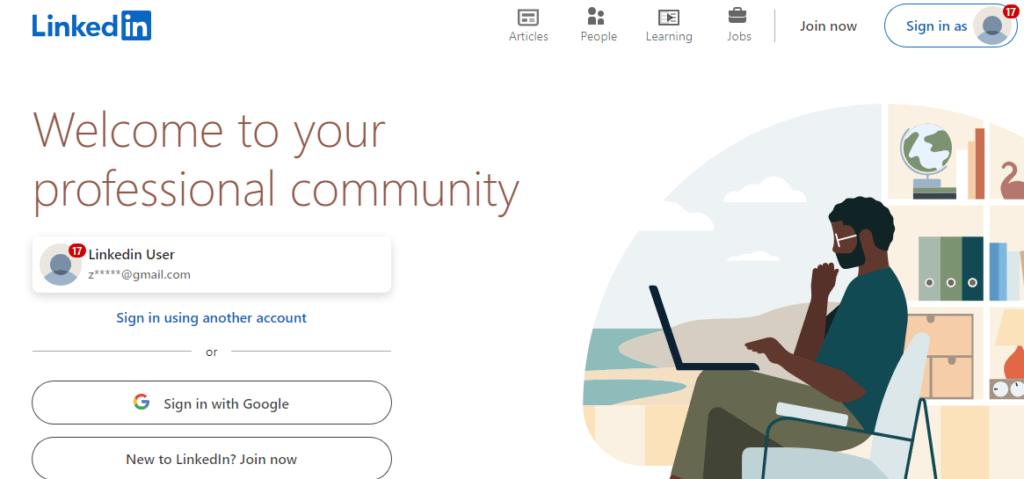
Access the LinkedIn homepage
Open your preferred web browser and navigate to the LinkedIn homepage at www.linkedin.com.
Sign in with your credentials
Enter your LinkedIn username and password in the provided fields on the login page.
Click “Sign In”
Once you’ve entered your login credentials, click the “Sign In” button to access your LinkedIn account.
Signing in successfully will allow you to proceed with adding your organization on LinkedIn.
Step 2: Access the “Work” dropdown menu
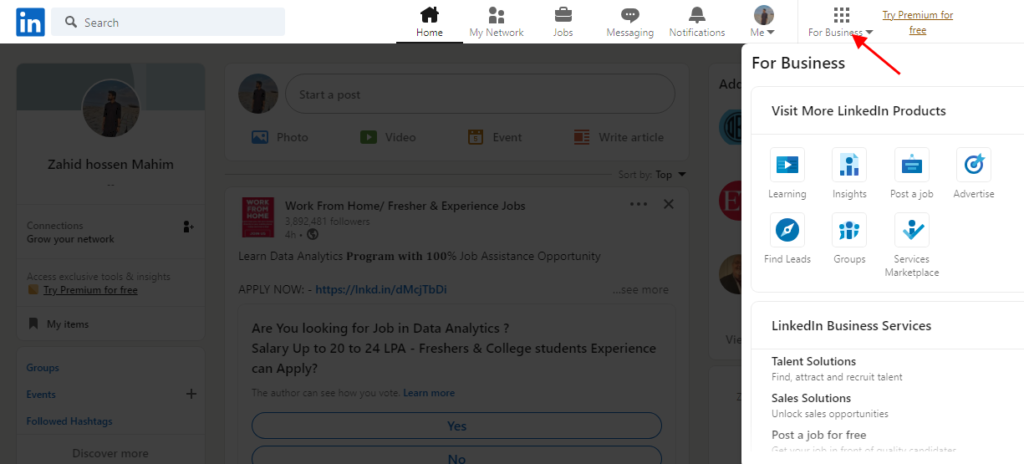
Locating the “Work” Dropdown Menu
After logging into your LinkedIn account, you’ll need to locate the “Work” dropdown menu, which provides access to various work-related options.
Revealing the Dropdown Options
- On the LinkedIn homepage, look for the top navigation bar.
- Identify the “Work” tab in the navigation bar.
- Click on the “Work” tab to reveal a dropdown menu.
This dropdown menu offers a range of options related to work, including creating and managing company pages, job postings, and more. Accessing this menu is essential to proceed with adding your organization on LinkedIn.
Step 3: Select “Create a Company Page”
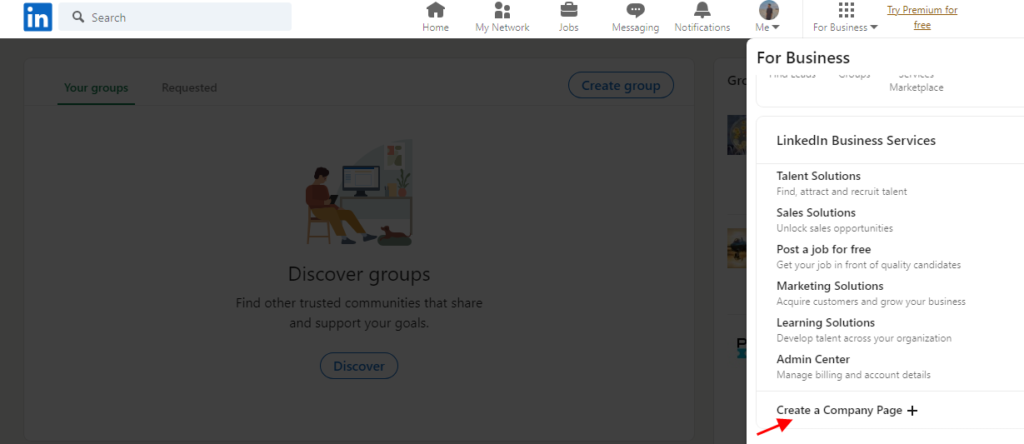
Accessing the “Work” dropdown menu
Locate the “Work” dropdown menu at the top of the LinkedIn homepage.
Click on “Create a Company Page”
Scroll down within the dropdown menu and click on the “Create a Company Page” option.
Initiating the company page creation process
By selecting “Create a Company Page,” you will be directed to the start of the company page creation process.
This step is essential as it enables you to begin setting up your organization’s presence on LinkedIn and establishing a dedicated page for your company.
Step 4: Choose your company size
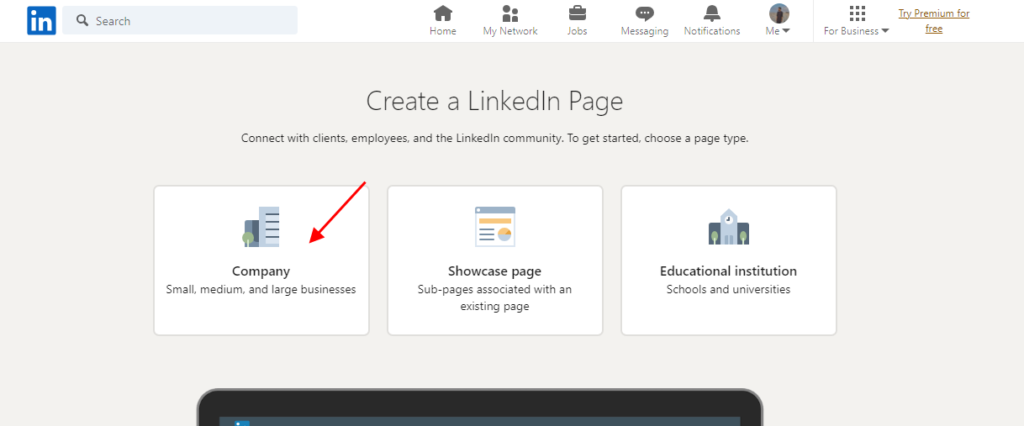
When adding your organization on LinkedIn, it is important to select the appropriate company size that accurately represents your organization. Here’s how:
LinkedIn’s Company Size Options
LinkedIn provides various options to choose from when selecting your company size. These options include:
- Small (1-10 employees)
- Medium (11-50 employees)
- Mid-size (51-200 employees)
- Large (201-500 employees)
- Enterprise (500+ employees)
Selecting the Appropriate Size
Consider the number of employees currently working in your organization to determine the most fitting company size option on LinkedIn. Choose the size category that aligns with your organization’s current workforce scale.
By accurately indicating your company size, you can ensure that your organization is appropriately categorized on LinkedIn, allowing professionals and potential clients to identify and connect with you more effectively.
Remember, selecting the right company size on LinkedIn enhances your organization’s visibility and increases its chances of being discovered by the right audience.
Step 5: Enter your company name and details
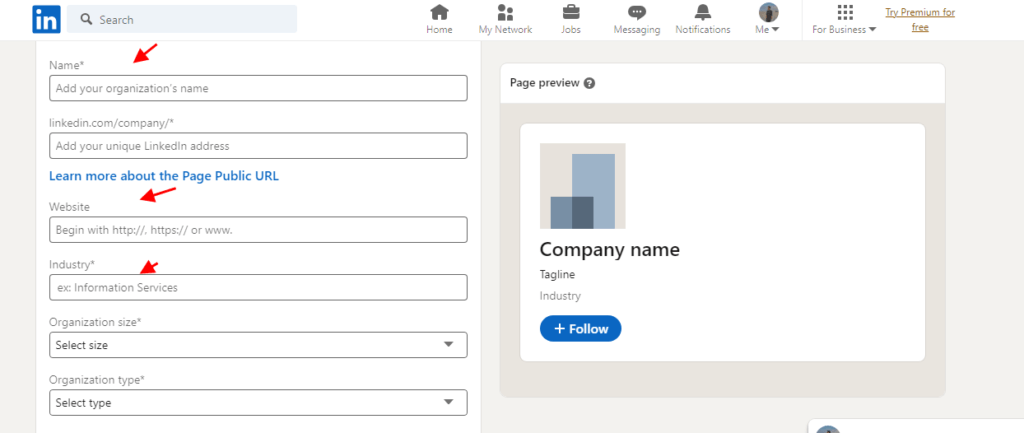
When adding your organization on LinkedIn, it is essential to provide accurate and compelling information. This step involves filling in the following details:
1. Company Name:
Enter the official name of your organization. It should be the same as your registered company name for authenticity.
2. Website URL:
Include the URL of your company’s website. This allows LinkedIn users to visit your website directly from your company page.
3. Industry:
Specify the industry your organization operates in. Choose the most relevant industry from the provided options to ensure accurate categorization.
4. Company Description:
Craft a concise and engaging description of your company. Highlight your unique selling points, core services, and any significant achievements. Aim to captivate potential followers and convey the essence of your organization effectively.
By providing compelling and accurate information in this step, you increase your chances of attracting interested followers and presenting your organization in a professional light on LinkedIn.
Step 6: Add a logo and cover image
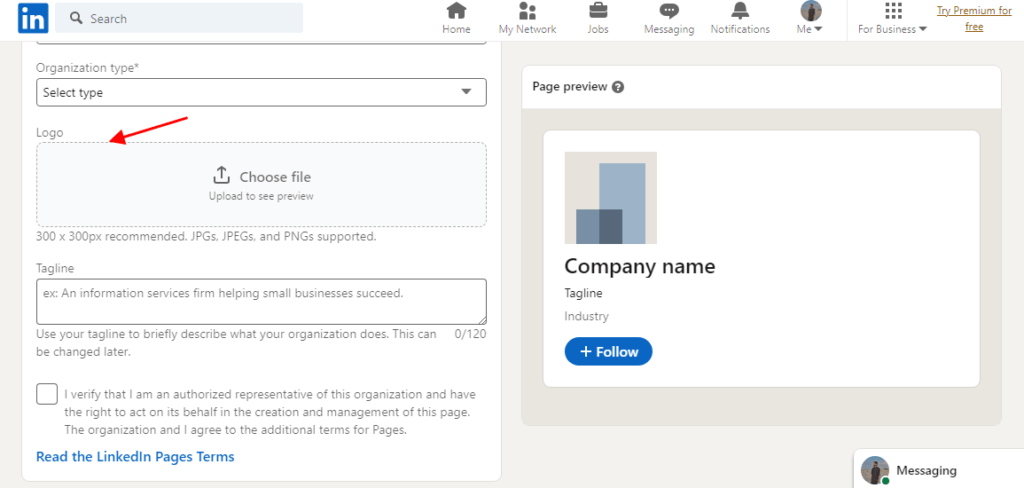
Upload your company’s logo
When adding your organization on LinkedIn, it’s essential to upload your company’s logo. A logo serves as a visual representation of your brand and helps establish a professional identity on the platform. Choose a high-quality version of your logo that is recognizable and reflects your company’s values and personality.
Select a visually appealing cover image
In addition to the logo, you should also include a visually appealing cover image on your LinkedIn company page. The cover image is the large banner that appears at the top of your page and provides an opportunity to showcase your brand’s visual identity or highlight a key aspect of your organization. Select an image that aligns with your brand’s aesthetics and captures the attention of visitors.
By adding both a logo and a cover image, you enhance your company’s profile and create a visually consistent and engaging presence on LinkedIn. These elements help attract potential followers, establish credibility, and make your organization more recognizable in the professional networking space.
Step 7: Enter your company’s basic information
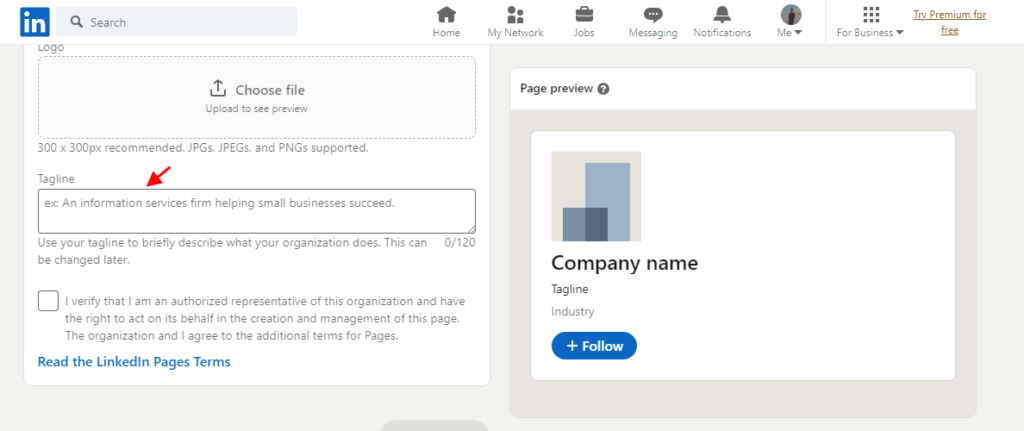
When adding your organization on LinkedIn, it’s crucial to provide accurate and compelling basic information about your company. This step allows LinkedIn users to gain insights into your company’s background and offerings. Here’s what you need to include:
Headquarters Location
Specify the location of your company’s headquarters. This helps potential clients, partners, and employees understand where your organization is based.
Year Founded
Indicate the year your company was founded. This information adds credibility and demonstrates the longevity of your organization.
Company Specialties
Highlight your company’s specialties or areas of expertise. This enables LinkedIn users to quickly identify the core competencies and unique strengths of your organization.
By entering these essential details in Step 7, you provide LinkedIn users with a comprehensive understanding of your company’s background, location, and core offerings, making it easier for them to engage with your organization.
Step 8: Verify your company email address
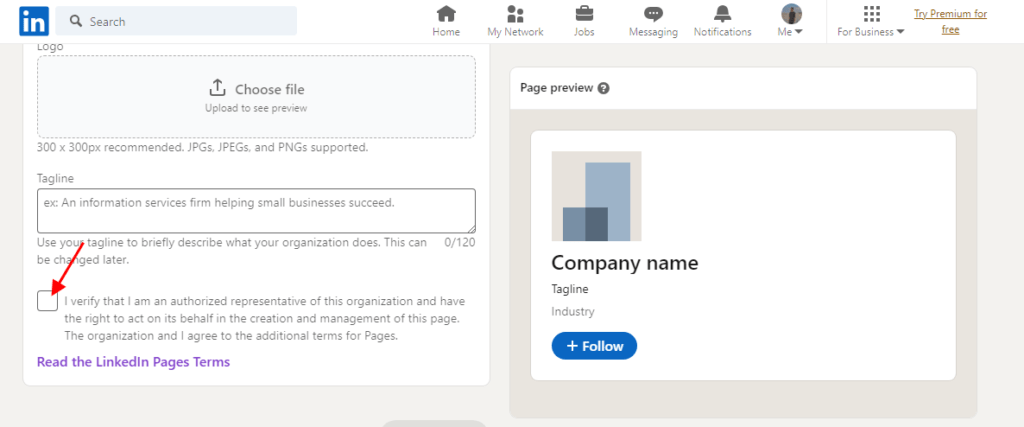
After providing the necessary information about your organization, it’s crucial to verify your company email address on LinkedIn. This step helps establish your authority and confirms that you have the right to create a LinkedIn page for your organization.
The Verification Process
LinkedIn provides a straightforward verification process to ensure the legitimacy of the company page. The specific steps may vary slightly, but generally, you can expect the following:
Check your company email inbox: Look for an email from LinkedIn that contains a verification link or code.
Click the verification link or enter the code: Open the email and either click the provided verification link or enter the verification code within the designated area on LinkedIn.
Complete the verification: Follow the instructions provided in the email or on the verification page to complete the process. This typically involves confirming your ownership of the email address by clicking a button or entering additional details.
Successful verification: Once you’ve completed the verification process, LinkedIn will confirm the successful verification of your company email address.
By confirming your ownership, you build trust with potential followers, clients, and business partners who visit your company page. This verification process also helps maintain the overall integrity of the LinkedIn platform by preventing unauthorized or fraudulent accounts.
Step 9: Publish your company page
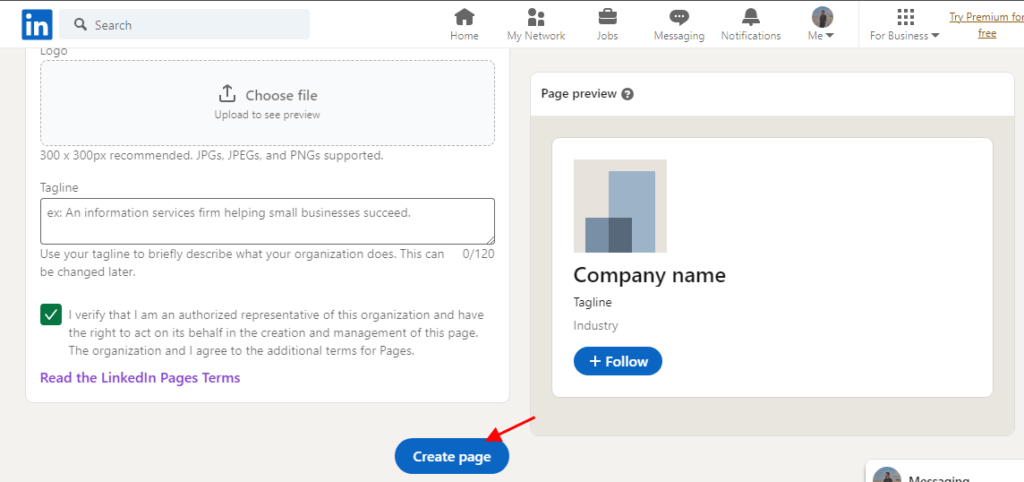
Review and finalize
Before publishing your company page, take a moment to review all the information you have entered. Ensure that everything is accurate, up-to-date, and complete. Check for any typos or errors in your company name, description, contact information, and other details.
Click on the “Publish” button
Once you are satisfied with the information on your company page, locate the “Publish” button. It is typically located at the bottom of the page or in a prominent position on the editing interface. Click on the “Publish” button to make your company page live on LinkedIn.
In conclusion, adding organizations on LinkedIn is a straightforward process that can have a significant impact on your brand’s visibility and professional networking efforts. By following the step-by-step guide outlined above, you can create a compelling company page on LinkedIn, allowing you to connect with potential clients, engage with industry professionals, and showcase your organization’s strengths.
Remember to optimize your company page regularly, share relevant content, and actively participate in LinkedIn groups and discussions to make the most of your presence on this powerful professional networking platform. Start adding your organization on LinkedIn today and unlock a world of opportunities for growth and success.

