According to a study conducted by Statista in 2021, YouTube had an estimated 2 billion monthly active users worldwide. With such a vast user base, it’s evident that YouTube is a primary platform for video consumption.
Additionally, YouTube supports a wide range of frame rates, including 24, 25, 30, 48, 50, and 60 frames per second (fps). Understanding the frame rate can help you assess the quality of a video and determine whether it suits your preferences or the requirements of a specific device.
In this guide, we will walk you through the step-by-step process of finding the frame rate of a YouTube video.
step-by-step process of How To Find the Frame Rate Of a Youtube Video
Step 1: Open YouTube
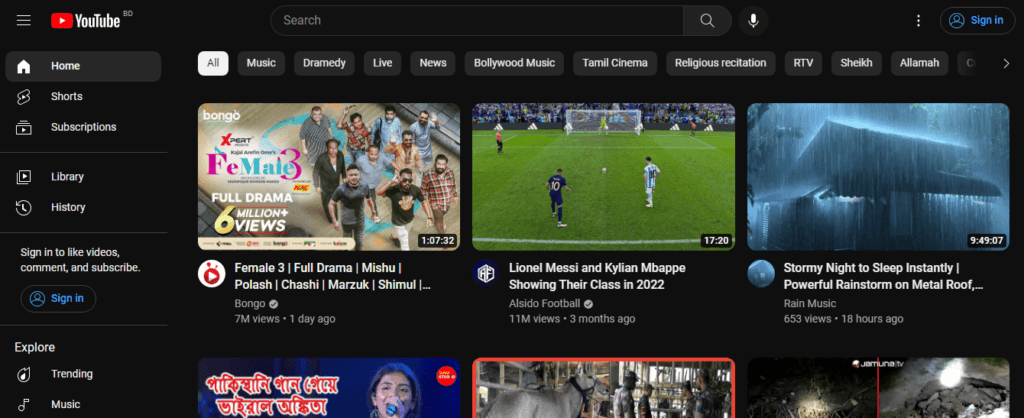
On Web Browser:
- Launch your web browser.
- Go to the YouTube website: www.youtube.com
On Mobile Device:
- Locate the YouTube app on your mobile device.
- Tap to open the YouTube app.
By following these steps, you will access the YouTube platform either through your web browser or the YouTube mobile app, setting the stage to find the frame rate of the desired video.
Step 2: Search for the Video
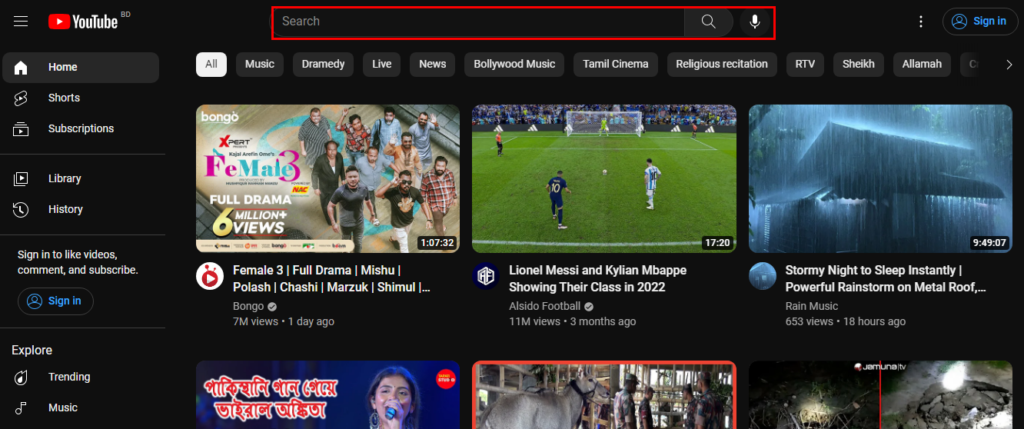
Use the YouTube search bar to find the video you want to determine the frame rate of.
Instructions
- Locate the YouTube search bar at the top of the YouTube website or app.
- Enter the title or relevant keywords of the video you’re interested in.
- Press the “Enter” key or tap the “Search” button to initiate the search.
Tips
- Be specific with your search keywords to increase the chances of finding the exact video you’re looking for.
- If you already know the username or channel name associated with the video, you can include that information in your search query to narrow down the results.
Step 3: Select the Video

Once you find the desired video in the search results, click on it to open the video’s playback page.
How to select the video:
Search for the Video: Use the YouTube search bar to find the video you want to determine the frame rate for. Enter the video’s title or relevant keywords and hit the “Enter” or “Search” button.
Scan the Search Results: Look through the search results to find the video you are interested in. The title, duration, and thumbnail can help you identify the right video.
Click on the Video: Once you locate the desired video, click on it to open the video’s playback page. This will allow you to access the video and proceed with finding the frame rate.
Remember, selecting the correct video is essential to ensure you find the accurate frame rate information.
Step 4: Right-click on the Video

If you are using a computer, follow these steps to access the frame rate information:
Locate the Video’s Playback Screen
Find the YouTube video you want to check the frame rate for and make sure it’s playing on your screen.
Right-Click on the Video
Using your computer’s mouse or trackpad, right-click directly on the video’s playback screen. This action will bring up a context menu with several options.
Access the Context Menu
From the context menu that appears, select the option labeled “Stats for Nerds.” This choice will open a pop-up window displaying detailed technical information about the video.
By following these steps, you will be able to proceed to the next stage of finding the frame rate of the YouTube video.
Step 5: Accessing “Stats for Nerds”

Click on “Stats for Nerds”
In the context menu, you will find an option called “Stats for Nerds.” This option provides access to the detailed technical information about the video.
By clicking on “Stats for Nerds,” a pop-up window will appear, displaying various technical details of the video, including the frame rate.
step 6: View the Video Information
After clicking on “Stats for Nerds,” a pop-up window will appear, providing you with access to detailed technical information about the YouTube video you’re watching.
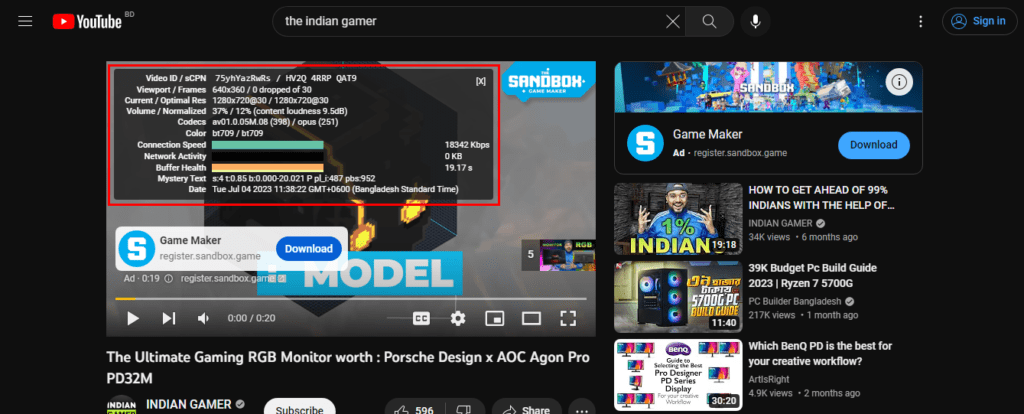
This window contains valuable data that can help you understand the video’s characteristics.
Technical Details in the Pop-up Window
In the “Stats for Nerds” pop-up window, you’ll find a wealth of technical details related to the video. These details may include:
- Video Resolution: The resolution of the video, such as 720p, 1080p, or 4K.
- Video Codec: The specific codec used to compress and decode the video.
- Audio Codec: The codec responsible for compressing and decoding the audio accompanying the video.
- Buffer Health: Information about the buffering status and health of the video playback.
- Network Activity: Data related to the network connection, including the current download speed.
By examining these technical details, you can gain a deeper understanding of the video’s quality, compression, and playback conditions. However, to specifically determine the frame rate, you need to locate and focus on the “Frame Rate” section within this pop-up window.
Step 7: Look for “Frame Rate”
In the pop-up window that appears after clicking on “Stats for Nerds,” search for the “Frame Rate” section. This section will provide you with the specific frame rate of the YouTube video.
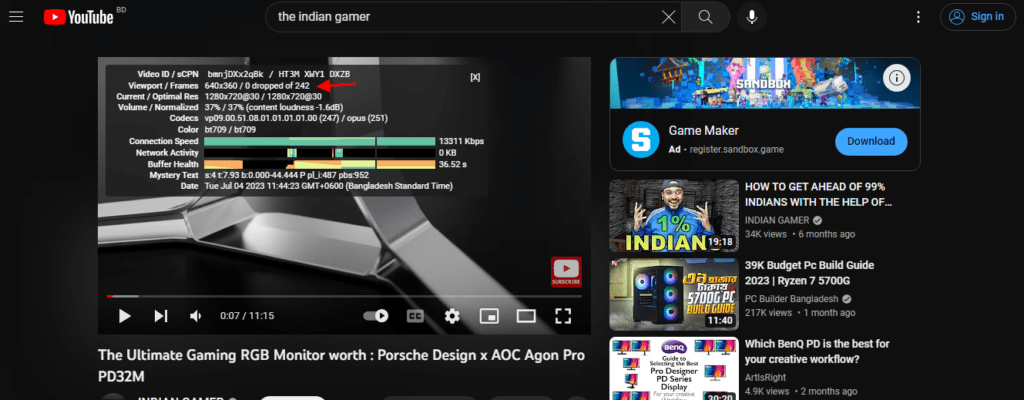
The frame rate is typically expressed in frames per second (fps), indicating the number of frames displayed in the video every second.
Example
mathematicaCopy codeFrame Rate: 30 fps
By identifying the frame rate, you can determine the smoothness and fluidity of the video playback, aiding in assessing its quality and suitability for various preferences or devices.
step 8: Note the Frame Rate
Once you have accessed the “Stats for Nerds” window, you will find the frame rate value displayed.
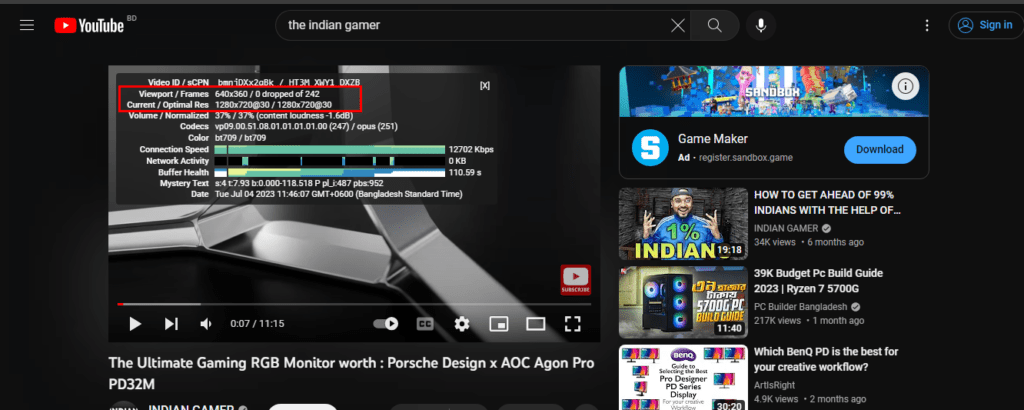
This value represents the number of frames displayed per second (fps) in the video.
Understanding the Frame Rate
The frame rate determines how smoothly the video plays. A higher frame rate, such as 60 fps, results in smoother motion, while a lower frame rate, like 24 fps, may give a more cinematic look.
Assessing Video Quality
Knowing the frame rate helps you assess the quality of the video. Higher frame rates are preferred for fast-paced action or gaming videos, while lower frame rates can be suitable for movies or slower content.
By noting the frame rate, you can make informed decisions about video playback preferences or compatibility with different devices and platforms.
Step 9: Close the Pop-up Window
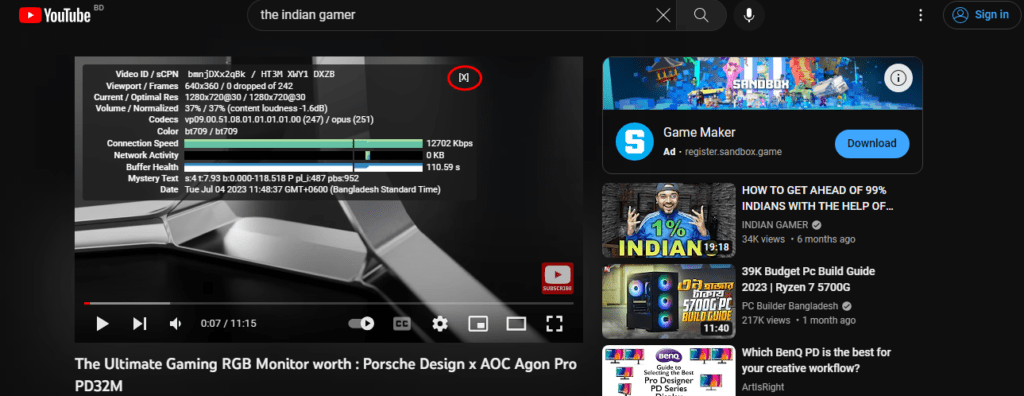
Once you have recorded the frame rate, it’s time to close the “Stats for Nerds” window. Here’s how you can do it:
Click on the “X” button
- Locate the “X” button, typically found in the top-right corner of the pop-up window.
- Move your cursor to the “X” button.
- Left-click on the “X” button to close the window.
Press the “Esc” key
- Locate the “Esc” key on your computer’s keyboard.
- Press the “Esc” key to close the “Stats for Nerds” window.
Closing the pop-up window will allow you to continue enjoying the YouTube video without any distractions.
In conclusion, determining the frame rate of a YouTube video is a straightforward process that can significantly enhance your viewing experience. By following the step-by-step guide outlined above, you can easily find the frame rate of any YouTube video.
Understanding the frame rate helps you assess the smoothness and fluidity of the video playback, enabling you to make informed decisions based on your preferences or device requirements. So, next time you want to explore the technical details of a YouTube video, remember these simple steps to uncover its frame rate and enjoy a more immersive viewing experience.
